Monday, December 28, 2009

Making Ink Jet Transparencies

My old printer was not designed for printing on transparencies but it did it. No problems and it did it for years. But as with all good things they get old and break down. It is a HP 7660 Photosmart printer. It started making noises and having problems loading paper and transparency film, while it still worked it’s days are numbered.

I started to search around for another inkjet photo printer. I found the Epson Artisan 800 and read all the specs about it. It printed on all sorts of paper; I thought it would print on inkjet transparencies also even though the specs did not say it would. After all it’s for Artisan’s!!!! Wrong!!!!!

The day it came I set it up on the wireless network and started test prints. It printed very good photos, and other types of images on card stock and fancy papers. But when it came to vellum it rejected it with notice that the printer was out of paper, please reload and press OK….. AAAaaarrrrrgggggg. But I thought maybe this is a fluke knowing the printer has plenty of vellum I pressed OK and it did it again. Dang!!!! I pressed OK again this time it picked two sheets of vellum and it printed the image I wanted. Hmmmm..... this gave me a clue I needed later. But before I do anything I better test Transparency film out too. Same results as the single sheets of vellum. Not good!!!!!

It’s time to call Epson support and see what’s up with this machine. I called and a short time later I was able to describe my problem to a tech. He looked up some info and told me that this machine does not print on vellum or transparencies. I asked if there was a work-around for that problem. He said no and it’s not a problem as the machine was not designed to print on those types paper. DANG!!!! I thought. After I got offline with Epson support I thought about it for a bit. I remembered that not all printers can print those types of medium. They have some kind of sensor to detect if paper is present and some vellum and all transparencies are not detected and rejected.

I remembered that the new printer did print on vellum when it picked up 2 sheets. I thought to myself I’ll make my own work-around. I got a piece of plain copy paper and an inkjet transparency, I taped the piece of paper the back of the transparency did the same to a piece of vellum. I ran them though the printer and they printed fine every time. After doing little more research I found that there are not many Inkjet printers that say they print on Transparencies. I got lucky with the Photosmart and made a work-around with the Artisan. When I move up to a wide format printer I’ll do a bunch more research before I buy.

Cya, Al
What to do for ink?

We have had good results with our Yudu inks. We started with 2 of the 3oz bottles that came with our kit and we purchased 2 of the 3 packs. Here is the problem-it goes fast!

Our local craft stores had limited choices so we have began researching different brands of ink that would be compatible with our Yudu. We found that water-based textile ink is the best choice for beginners. Soap and water is all that is needed for clean up and it can be heat set with an iron.

I found three main brands that were readily available online from art supply stores:

Jacquard screen printing ink
I found the average price was 4 oz for $4.35 and 16 oz $11.37.

Speedball water-based textile screen printing ink
The average price I found for an 8 oz bottle was $5.74 and 32oz for $16.99.

Permaset Aqua fabric ink
The 300ml (about 10oz) for $8.37 and 1 liter (about 33oz) for $18.37.

We found that even with shipping, we saved quite a bit and had a wide choice of colors. Our first shipment of Permaset Aqua fabric ink will be in next week. We also want to try Speedball as we have read on the forums that they have worked well with the Yudu.


Michelle

Sunday, December 27, 2009

HELP! WE NEED SHIRTS....

We have been printing on everything we can think of, but WE ARE RUNNING OUT OF STUFF TO PRINT ON!

When we first started printing with our Yudu, we used coupons and bought some items at Michaels. We paid $9 for a cute tote bag and got 2 shirts for $5 on sale. At this rate we are going to run out of supply funds. Our friends want shirts and we have so many ideas!

We have been doing a little research on resources for items to print on. Here are two places we have looked at and how they compare.

Shirtcamp.com
http://www.shirtchamp.com
There are no minimum size orders for Shirt Camp, but they do charge a $10 handling fee for orders under $75.

Shipping is fast for me in Oregon with 3 days being usual according to their site.
UPS charges for my 10pc order of tote bags would be $14.95, but with these 10 items I would need to pay a $10 handling fee.

T-Shirt
100% cotton pre-shrunk 6.1 oz t-shirt by Anvil 976. Large size white $1.65 each

Tote bag
100% cotton 10 oz heavyweight canvas tote. Toppers 0801 Size: 10.5”x 14” x 5” 24” handles $2.50 each

BlankApparel.com
http://www.blankapparel.com
There are not minimum orders for Blank Apparel and no handling fee.
Your price goes down with the quantity of items that you order. They also group together your different items to give a discount also.

The shipping was fast for Oregon with one day transit.
UPS charges for an order of 10 tote bags would be $12.45

T-Shirt
100% heavyweight cotton, 5.4 oz., preshrunk Anvil Large size white $1.98

Tote bag
8 oz. cotton. Self-fabric handles. Harvard Square Size: 15” x 14” ½” x 1”
$2.03 each

In conclusion, online is the way to go for us. At this time my choice is going to go with BlankApparel.com. I like the flexibility of being able to mix totes, aprons, T-shirts and other products and receive a discount for buying 12 items without worrying about a $75 minimum order. In the future, if friends’ demands for shirts keep growing I may go with Shirtcamp.com to get the higher quality for about the same price.


What about inks? click here!

See what we did for emulsion here!

Saturday, December 26, 2009

Projects to do on the Yudu

We caught what we think is the flu and so our projects didn't go as far as we would like. Here are some designs we have in process:

Photobucket


Photobucket


Allen took these photos of items we have around the house and transformed them into these images. We are looking forward to burning them and seeing what they look like.


Want to know how you can transform your pictures? Click Here!

Yudu mistakes and you learn more- Tips to share

We recently did a project and learned a lot from our first failure. Marie made this design in Photoshop 7 using brushes and included the title of her favorite song.

Photobucket

The first time we screened the design it flooded from the edges of the design and was completely ruined. We quickly washed the tote in cold water to remove the ink. Here is what we learned:


  • Blocky images are harder to flood with ink when pulling the design as a beginner. It is harder to make an even coat with the larger space.

  • If the image is too close to the edge of the emulsion on the screen the ink squeezes out the sides and bleeds and ruins the sharp edges. We have started to watch how close our designs are to the edge of the screen. Even taping the design can not prevent this from happening if it is too close to the edge.

  • To keep the tote flat while printing we cut a piece of thick strong cardboard and stuffed it into the tote. Then we screened it in the Yudu as usual.

We redid the screen and rescreened the tote. Here is our finished product. Sometimes we learn valuable lessons from our mistakes!

Photobucket

Friday, December 25, 2009

Some projects in the works!

Photobucket

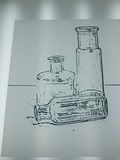
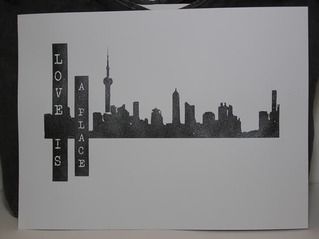
An image ready to be burned. It is on vellum.


Photobucket

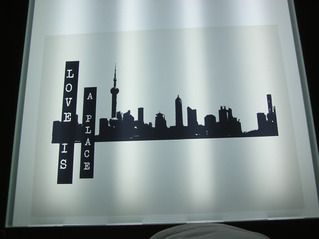
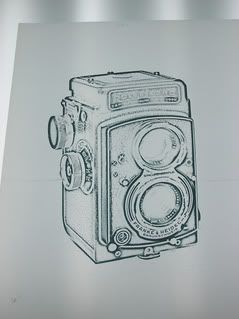
Here is an image on a transperancy.


Photobucket

This is the image screened onto cardstock.


Photobucket


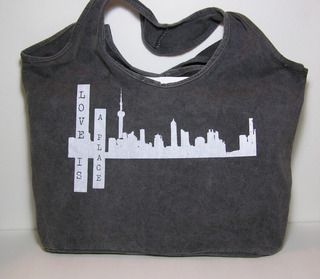
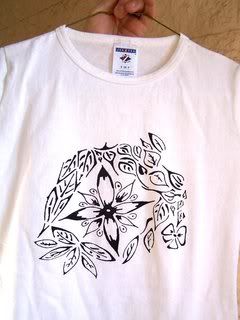
Here is one of our first images on a t-shirt

Try this image!

Photobucket
Hey everyone, how are all your screenprinting projects going?

I'm pretty excited for mine. We just got a new printer with a built in scanner on top. Now I can scan in all of my sketches and start screenprinting them onto what ever I want.

I've been fooling around all morning with a few of my drawings, so I thought that I would share with you my first sketch turned into yudo design.

Keep in mind I haven't burned a screen with this design so I don't quite know if the tips of the beak and feet will turn out but feel free to use it for any of your yudo projects!

Here is a link to a larger image to the picture above:
-{bird}-

I'd love to hear about some of your finished project or designs, so leave a comment! and feel free to ask questions if you have any problems.

I'll be updating every once in a while with new designs that you can use in the future too, so make sure to come back and check :)

-Marie

Labels:

Quick Yudu hints and tips

Photobucket
Here are just a few tips we have learned so far:

If your emulsion starts to tear- it is probably too wet. Use a hairdryer to dry the emulsion where it is trying to tear or let it set longer in the drying chamber.

To speed drying time before printing a new color of ink- Lift the screen very carefully and use the hairdryer to dry the ink to prepare for a new color.

Save money and put 4 to 5 images on each screen for multiple uses. To use one image just tape off the area that you aren’t screening.

In your image editor set your RGB values to 0 to ensure your image comes out as black as possible.

To get a darker image when using your photo printer make sure to use photo not black cartridge only. This lays down more ink for a darker image that burns better.


Yudo mistakes and learn more, click here to see what we learned.

Labels: , , ,

Wednesday, December 23, 2009

Yudu Perfectionism?

There it was sitting on the counter daring me to use it! This is what we had anxiously been waiting for and been researching.


I couldn’t think of what to do-my perfectionism was holding me back . Making a T shirt seems too permanent for a first creation and buying a design too expensive. After all wasn’t the whole purpose of it was so I could express my creativity and create designs.

Then it hit me-paper was the answer! I love little notebooks and cards and with the 220 mesh screen I could print designs and even if they weren’t perfect I could make a cover for one of my notebooks.


I started going through images and looking for images that would be good for a first project. I knew from watching Al that there would be a learning curve for me in pulling the ink across the design and I wanted something simple.

While browsing, I found that the images that I really like are silhouettes. I saw several that gave me an idea for my design and I saved others for ideas for future projects.

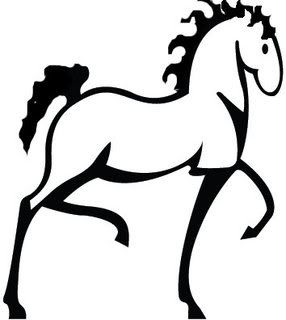
I downloaded Gimp after finding it by googling it. It was very easy to download and use. I saved my image and made a few little changes. Below is my image.
horse
Now I am ready to make a print of my image and burn my first screen.

Labels: , , ,

Image Manipulation

The purpose of this post is to explain how to convert a photo or other image into a positive image, an important first step in the screen printing process.

To start with I’m going to use the image editor “Gimp”. It can be downloaded for free and is a very effective photo image editor. Up to now I have been using Photoshop 7, but it is old so may not be available to everyone.

It is very important to choose/make images with as plain a background as you can get. A background with all one color is best, if at all possible. This makes editing out the background noise a lot easier.

First open Gimp and import the image that you want to work on. I save the image to a new name, that way I can use the original later elsewhere if needed. Go up to the menubar and select image, then in the dropdown menu select “Mode”. In this menu select grayscale. Grayscale will remove the color information and make it easier to convert your file to a burnable image.

Then go back to the menubar and select Filters, in the dropdown menu. Click on Artistic and go over to Photocopy and choose it. A box will pop up that will give you a preview and four adjustments, this window will allow you to drag the preview to a section of the image so you can see what you are doing. Then you can play with the four adjustments till you get the image that you like. The ones I adjust most often are ‘Mask radius’, ‘Percent black’ and ‘Percent white’. Once I’m happy with the image I’ll click OK and then save the image.

Sometimes I’ll go to “Colors” on the Menubar and select Brightness-Contrast in the dropdown and make further adjustments as I see fit. If somewhere in the process I don’t like what I see I’ll go to edit and click on undo till I get back to a point where I’m happy and start again.

This is a very simple tutorial and it assumes you know something about editing images in an editor.

The next post will cover printing the image with an ink jet printer.


Cya, Al

Having difficulty, post a comment and I will try to help.

Labels: , , ,

An Artist is most critical of their own work

My next project was printing on a tank top for my wife with the text “Living the Dream” the title of her blog.

Again, I started to peel the emulsion sheet backing before it was completely dry, but this time I was ready for it to try and tear. I stopped myself just in the nick of time. I plugged in the hair dryer and finished drying the emulsion.

After I burned the screen I pulled the tank top onto the platen, squeezed out a nice bead of white ink onto the screen, flooded the image. I did one pass with the squeegee and carefully lifted the screen to look at the printed image, it looked weak/thin, and the white did not cover. I was expecting that this could happen so I was ready with my hairdryer and I flash dried the ink and made another pass with the squeegee. This time I had good coverage.

The issue was the material; it is ribbed 100% cotton. When I applied the ink, it flowed down between the ribs and out past the edge of the image just a bit. To me it gave a slight saw tooth effect. Not what I was after, but not objectionable either as the girls liked it.

Here is a thought I want to share. The project I just described underscores the saying “an artist is most critical of their own work”. When I noticed the saw toothed edges it seemed as though they jumped right at me, the girls didn’t even notice until I pointed it out. Even then they didn’t mind nor has anyone else who looked at the image since then. Don’t be so quick to condemn your work.

Cya, Al

Let us know about your experiences and challenges with different types of material and what works for you or didn't!

Labels: , , , ,

Saturday, December 19, 2009

How we started with YUDU

My wife and daughter saw the YUDU infomercial on TV. I knew that Marie is interested in screen printing so I thought let’s do some research on the net and see what we come up with.

The next day we ordered the same kit on the infomercial from COSTCO but for $60 cheaper. Five days later it showed up. We unpacked it looked at all the info. Then it just sat for a week!

We knew we had a finite amount of stuff and replacement emulsion sheets were going to be expensive. So we didn’t just want to burn screens willy-nilly.

Finally, I came up with a logo for the RC club I belong to and I found a picture of a car that I like. I got on Photoshop and made positives of each.

Next, I put the emulsion sheet on a 110 screen. For the first time doing it, I didn't think it was too hard I just followed the instructions.

When drying the emulsion make sure it is very dry. If you get impatient you will run into problems.

When I did my first screen, the emulsion wasn’t completely dry in the middle. When I pulled the plastic backing, the emulsion stuck to the plastic backing in the middle of the screen and I got a small tear in the emulsion. I stopped what I was doing, dampened the area of the tear and pressed it back into the screen. And put it back into the dryer. This time, I made sure it was dry before I finished pulling off the plastic backing. I washed out the uncured emulsion and I was happy with the results.

After I dried the screen, I pulled out a tee shirt from my drawer and printed my first tee! I had burned two images into my first screen as I wanted to get the most out of those expensive emulsion sheets.

After I taped off the part of the image that I didn’t want to use and edges, I printed the back of my fist tee.

Next, I cleaned the screen and taped off the first image I used and went on to print the front of the tee. Unfortunately, I have already reclaimed the screen so I cannot show how I burned the images into the emulsion. Below is a picture of the front and back of the tee. I set the ink by pressing the tee for about 3 minutes with the iron set on cotton.

We are just beginner screen printers and we have found lots of good info on the net on the subject. This blog is set up to help with your/our journey into the craft and I can see it evolving into something more, but we have to start somewhere.

I have kept notes on each project and found ways to make things a little easier. I have also found ways to cut costs on supplies. These will be posted here in the near future.

Cya then, Al

This is the logo on the back of my first shirt
Photobucket

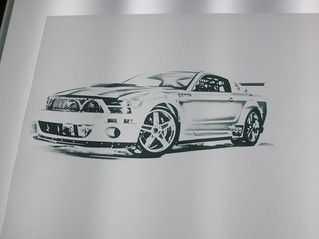
This is car image on the front.

best yudu

Labels: , , , , , , , , ,