Laying down Yudu ink- New project part 3
Time to print! I have chosen chocolate brown Yudu ink for my first design.
I started to lay down my bead of ink above my image. It seemed like there was more than enough ink after two passes but Al told me to keep going! By the time I finished adding the ink it seemed like I had way too much ink on my screen. I was sure it was going to push through the screen and ruin my paper.
Next, I lifted the screen slightly and pulled the squeegee across to flood my design with ink. Then, I set down the screen onto the paper and used the squeegee to pull ink across the screen again.
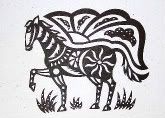
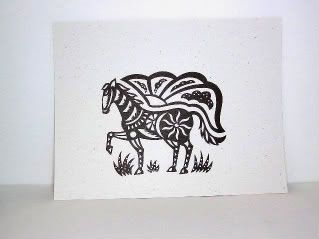
I lifted the screen and a perfect sharp image had printed on my card stock. I felt a real sense of satisfaction. I loved this image and printed it on green, white and beige cardstock.
Flushed with success, I continued with my next image. I flooded the screen pulled across the image and this is what I saw.
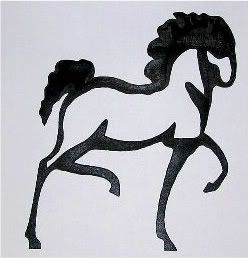
What happened! I had used too much pressure and too sharp of an angle with the squeegee and the ink came out under the edges and coated the underside of the screen. Now what? We used paper towels and gently wiped the underside of the screen until it was clean, then we reflooded the image. The next pass provided a pretty good image. I was controlling the pressure better and the angle of my squeegee.
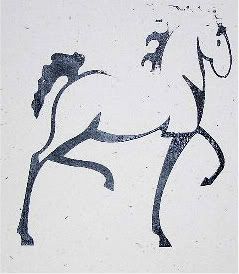
Sometimes, I lifted the screen and the paper did not have any ink at all! I had to add additional ink and flood the screen again to continue. This is what it would look like when I didn't have enough ink.
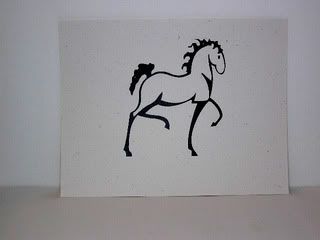
I loved the experience and think that the first design is a keeper. I think I would like to see it printed on material. I have a much better idea of what I like and have a better feel for holding the squeegee. I am screen printing!
I started to lay down my bead of ink above my image. It seemed like there was more than enough ink after two passes but Al told me to keep going! By the time I finished adding the ink it seemed like I had way too much ink on my screen. I was sure it was going to push through the screen and ruin my paper.
Next, I lifted the screen slightly and pulled the squeegee across to flood my design with ink. Then, I set down the screen onto the paper and used the squeegee to pull ink across the screen again.
I lifted the screen and a perfect sharp image had printed on my card stock. I felt a real sense of satisfaction. I loved this image and printed it on green, white and beige cardstock.

Flushed with success, I continued with my next image. I flooded the screen pulled across the image and this is what I saw.

What happened! I had used too much pressure and too sharp of an angle with the squeegee and the ink came out under the edges and coated the underside of the screen. Now what? We used paper towels and gently wiped the underside of the screen until it was clean, then we reflooded the image. The next pass provided a pretty good image. I was controlling the pressure better and the angle of my squeegee.

Sometimes, I lifted the screen and the paper did not have any ink at all! I had to add additional ink and flood the screen again to continue. This is what it would look like when I didn't have enough ink.

I loved the experience and think that the first design is a keeper. I think I would like to see it printed on material. I have a much better idea of what I like and have a better feel for holding the squeegee. I am screen printing!

Labels: flood the screen, too much ink
posted by Michelle at
6:14 PM
![]()


1 Comments:
Really cool. Great tutorial. Thank you!
Post a Comment
Subscribe to Post Comments [Atom]
<< Home